
You can recruit participants for your m-Path study using Prolific. This is a powerful way to quickly reach a large pool of participants. However, setting up the connection between Prolific and m-Path is not always straightforward. That’s why we’ve created this guide: to walk you through the steps and help you avoid common pitfalls.
Setting up a study on Prolific can be a bit tricky because the platform is designed for surveys that are completed in one go. It is not initially built for diary studies, where participants answer multiple beeps over several days. Prolific usually recommends creating one study per day for each day you send beeps to participants. However, if your study lasts a week or longer, that approach can become very cumbersome for researchers.
High-level overview
The following overview offers a preview of the process. The goal is to show how the individual steps connect before we examine them in detail. Everything will be explained in detail further down the page.
We found a way to simplify the process on Prolific by only creating a single Prolific study for the entire period instead of a prolific study for every day or even every beep. We made an onboarding page for participants on m-Path to easily invite the prolific participants to your study. With the URL we’ll give you further down this page, they’ll be able to download the app and join your study with ease. Next, you’ll create an intake questionnaire where you collect the participants’ Prolific ID, ask for consent, and apply your study protocol. At the end of the intake survey, participants you’ll give the participants their Prolific completion code. While this makes it appear that the study has ended, it actually just marks the start of the diary portion. For each beep that participants answer, you’ll have to provide a bonus payment. At the end of the study, count the total number of beeps answered per participant and pay them accordingly. This approach keeps the workflow simple for researchers while still compensating participants fairly for their effort.
Next, we’ll explain step by step how to set up everything to make this work on the m-Path dashboard and on Prolific. First we’ll explain on what to do on your m-Path dashboard before transitioning to what to do on Prolific to make everything connect.
Step-by-step guide: Setting up your study in the m-Path Dashboard
Now that you have seen the high-level overview, we will dive into the practical steps required to set up your study. First we’ll start with what to do on the m-Path dashboard itself.
1. Create a m-Path protocol
Create a protocol to enroll participants once they have filled in the intake survey. A protocol makes sure you have the same schedule for all your participants.
Beep properties
In your beep properties in your protocol, make sure to tick “One time answer” This setting prevents participants from filling in the same questionnaire multiple times once the study is over.
If this option is not selected, participants might keep repeating questionnaires even though they’ve already completed the required beeps. We noticed this in our own tests: for example, a participant answered eight questionnaires but only four actual beeps. This creates confusion, both for you (how do you decide what to pay for?) and for the participants (they don’t know if they should keep answering or if they’ll be paid for it).
To avoid this grey zone, we strongly recommend enabling “One time answer.”
2. Create an intake survey
To proceed, we’ll create an intake survey, which plays a central role by fulfilling multiple objectives. First, it should collect participants’ Prolific IDs, which you’ll use later to determine who should receive bonus payments. Second, it should ask for consent. Third, it must include the completion code(s) that participants will use to return to Prolific and claim their payment.
You can also include additional questions in the intake survey to screen participants further, for example if the prescreening settings in Prolific are not sufficient or if you want to double-check eligibility. Use the instructions given by Prolific about screening participants within your study if you’d like to do this.
We created a template on the dashboard so you can get a headstart: Intake Prolific Template. If you don’t know yet how to make a questionnaire from a template from the library, we have a great explanation on it here: Use a questionnaire from the library.
In the following paragraphs we’ll explore the possibilities for the collecting of the prolific ID, ask for consent and including of the completion codes.
2a. Collect the Prolific ID
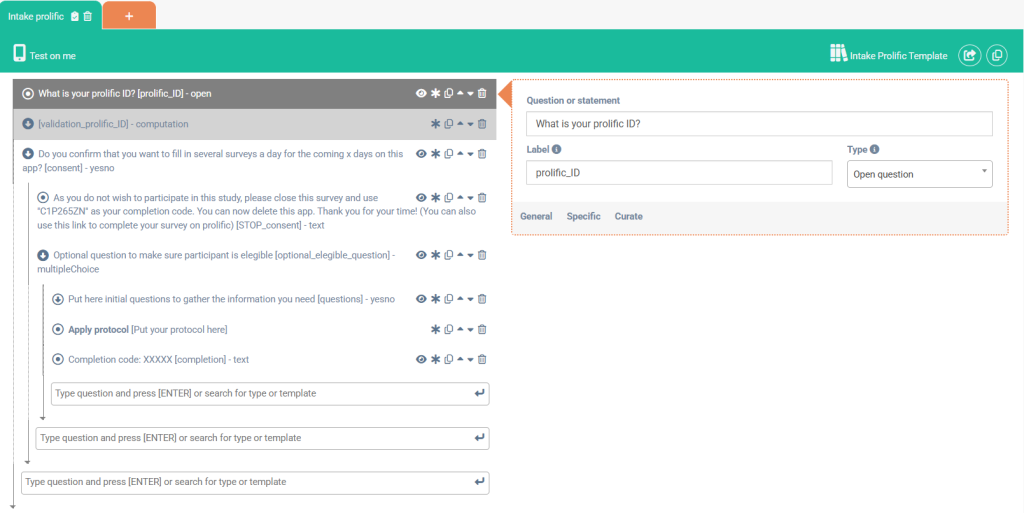
The first question in your intake survey should be the question about the participant’s Prolific ID. Ensure that the question field accepts both numbers and letters, as Prolific IDs have 24 alphanumeric characters (so we recommend using the Media: Text item). You can optionally add a validation check using regex to ensure the ID is in the correct format. To validate the ID, add a computation question after your Prolific ID question and name it something like validation_prolific_ID. In the script field, use:
validation_prolific_ID = grepl("^[a-zA-Z0-9]{24}$", prolific_ID)(This regex snippet checks if the ID consists of 24 alphanumeric characters. If it’s valid, it will return true, otherwise false).
![Shows a computation item with label "validation_prolific_ID" and the following regex: "validation_prolific_ID = grepl("^[a-zA-Z0-9]{24}$", prolific_ID)"](/wp-content/uploads/2025/09/image-1.png)
Two important side notes to make sure it works correctly:
- It’s important that the second part of the grepl function (in this example “prolific_ID”), is the same as the label of your text type question for the prolific ID
- The label on the left of the equation and the label of this computation item has to be the same
Then add a conditional text for when the result is “no,” for example: “Prolific ID is invalid. Please give a valid ID.”
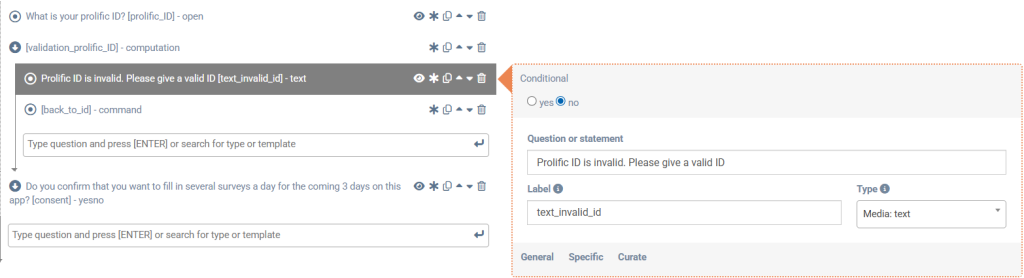
Finally, add a conditional command where the Goto label is the label of your Prolific ID question to send the participant back to the Prolific ID question. This ensures that participants cannot continue with an invalid ID, avoiding issues with payment later.

2b. Ask for consent
It’s important to make participants aware of the commitment required for a diary study. Hopefully, they have already read the study description on Prolific where this is explained, but it’s best to double-check during your intake survey. If a participant refuses to give consent, Prolific also provides guidance on consent and what to do if they don’t consent.
2c. Apply protocol
If the user comes to the end of the intake and has given consent and is elegible for participating in your study. Don’t forget to add Apply Protocol to your intake, so that participants’ beeps will get scheduled.

2d. Include the completion code(s)
At the end of your intake, you must include your completion code. This is the code that the participants use to proof to prolific that they did in fact do the survey, so only give this code as the very last “question” in your intake. This completion code can be found in the settings of your prolific study under Data collection: completion paths. Double check when finalizing your project on Prolific that you refer to the correct completion code!
3. Enable auto-enroll
Now we bring everything together by setting the auto-enroll. On your dashboard, go to “Settings”, “Auto enroll”. “Default enrollment” section will open. Choose for “Simple Intake” and choose the intake you’ve made. This way participants will immediately come to your intake when they download the app and add you as a researcher.
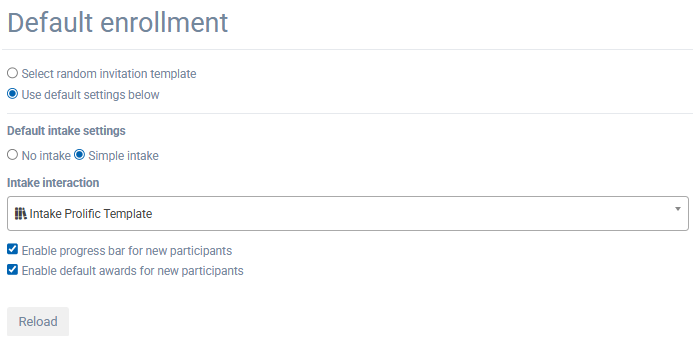
The “Apply protocol” you added inside the intake, will make sure the study starts once the participant filled in the intake survey!
Step-by-step guide: Preparing your study in Prolific
Now that you have completed the setup in the m-Path dashboard, the next step is to configure your study in Prolific. In this chapter, we will walk through the necessary settings on the Prolific platform to ensure that your study is correctly prepared for participant recruitment and data collection.
When setting up your study on Prolific, you’ll encounter many options and settings. In this guide, we’ll focus only on the settings that are necessary to make your study work with m-Path. All other settings, such as study design, participant criteria, or payment amount, depend on your specific survey and research goals, so you will need to decide those yourself.
Study details: Study description
As mentioned by Prolific, it is very important to give an elaborate description when doing a diary/ESM study. Explain to them that they’ll need to download an app, that it is a diary study and what that entails, how the payment will go, what they will get paid for,…
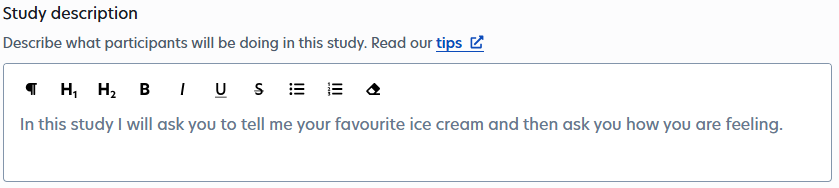
Below you’ll find an example text that you can use as a basis and adapt with your own study details.
We do a study about XXX
This is a diary study, meaning we will ask you to fill in surveys multiple times a day for a couple of days (in this case XXX days). So it’s not just a basic survey where you answer one set of questions, and you’re done.
A little explanation on what to expect:
. You’ll be directed to a page that explains to download an app (compliant with most devices and requires +-20MB of space on your phone) and on the page is an explanation on how to get started on the app
· First fill the intake survey you’ll automatically get in the app, so we can make sure you’re eligible to do this survey and get some basic information. (make sure to fill in your prolific id correctly to make sure we can make the bonus payments later!)
. If eligible, you’ll receive three daily notifications for three days in a row, starting the next day, to fill out a quick survey ([XX ESTIMATED TIME]). Please fill in this survey as soon as possible after you get the notification. Your chance to fill it in will disappear after a short while!
. You’ll get your completion code after the intake survey, but you will get bonus payments for every survey you’ll do in between (£XX per survey and a survey takes about XX min)We estimate that in total you’ll need XX minutes time to do the whole study (from intake until last survey).
If you filled in all the surveys, you get an additional bonus payment of £XX! So make sure to fill them all in!
This means that when you filled in the intake and if you fill out ALL the surveys you would in total receive £XX (which is equivalent to £XX/hour).
We will try and make sure all bonus payments are paid out max 2 weeks after the last survey. We have to do this process manually, so we need a bit of time, thanks for your patience!
Thank you so much for your cooperation!
Study details: Device requirements
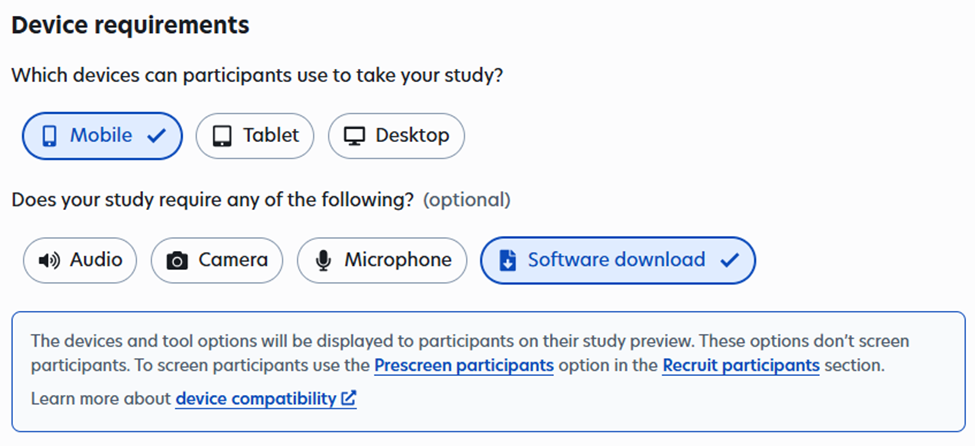
When setting the device requirements for your Prolific study, it is important to at least select “Mobile” and “Software download.” This ensures that participants can use the m-Path app on their smartphones, which is necessary for completing the study. If your surveys require additional features, such as audio recording, camera use, or microphone access, you can also select Audio, Camera, or Microphone accordingly.
Data Collection: URL
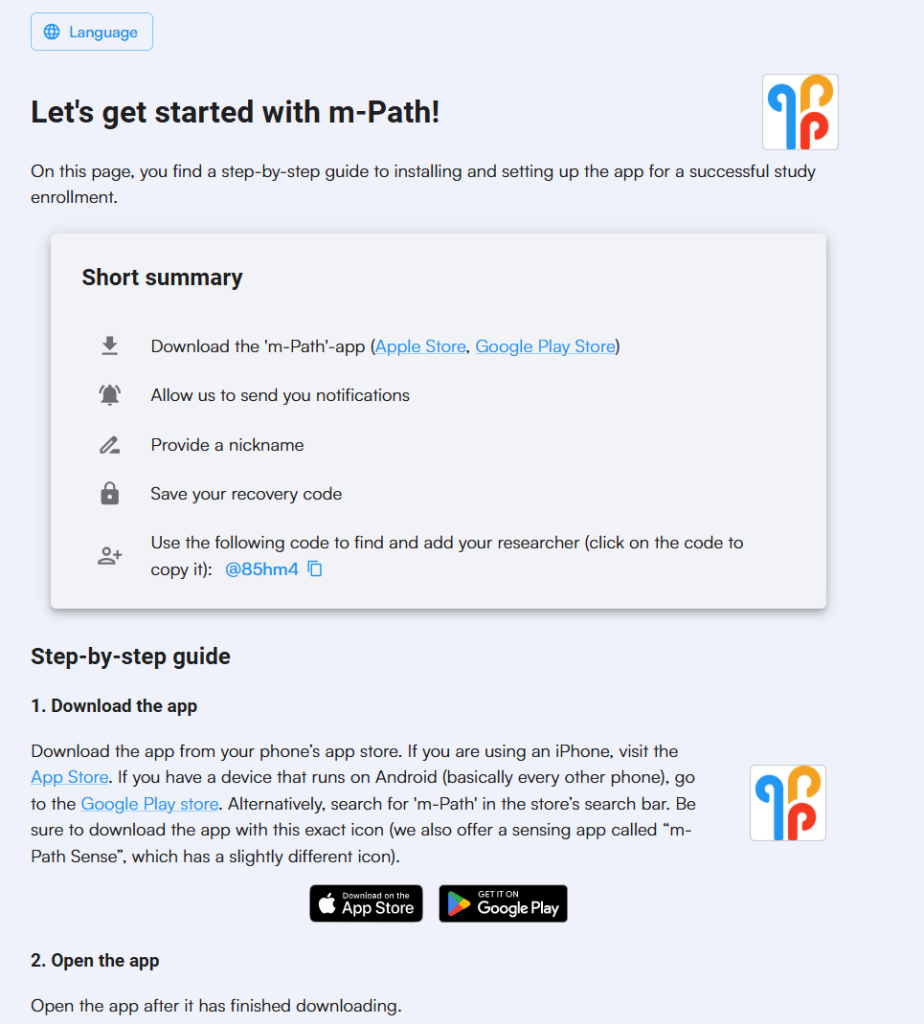
When participants join your study, they first need to go to a special onboarding page. This page guides them through downloading the m-Path app on their smartphones and links them to your study as a researcher. It ensures that each participant is correctly connected to you and your research project.

The base URL for onboarding is: https://m-path.io/onboard/ (feel free to copy this link). To use it for your study, you need to add your personal m-Path researcher code, including the @, at the end of the URL. For example, if your reseacher code is @99aa9a, your full URL would be:
https://m-path.io/onboard/@99aa9a
Always test the URL yourself first to make sure it opens correctly and takes participants through the onboarding process as expected. Here’s an example on how that page could look like.
If you get an error, it means your code is wrong, so please check if you made any mistakes.

Data collection: Prolific ID’s
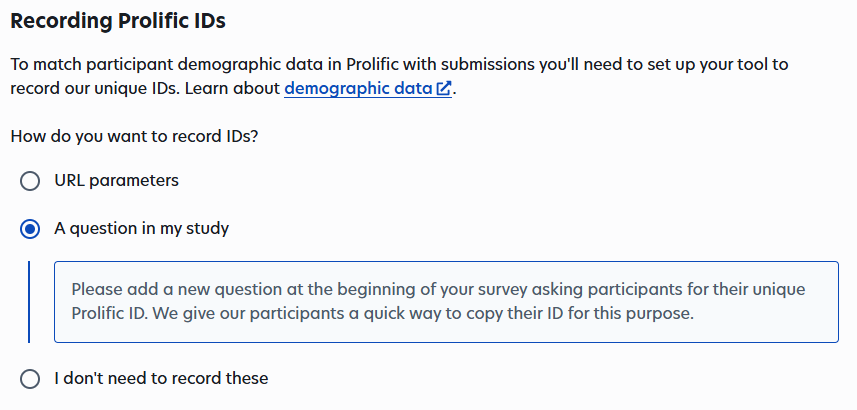
For recording Prolific IDs choose “A question in my study”. In your intake survey, be sure to include a question asking participants for their Prolific ID, because you will need this information to track who earned which bonus payments. Scroll up for a step-by-step explanation on how to set this up and add validation.
Data collection: Completion paths
This is the place where you get your completion code(s). Decide for yourself if you need multiple completion paths or not, and include them in your intake survey. Take into account that we only use the completion paths for the intake, not for the actual surveys they fill in afterwards.
Recruit participants: Credentials
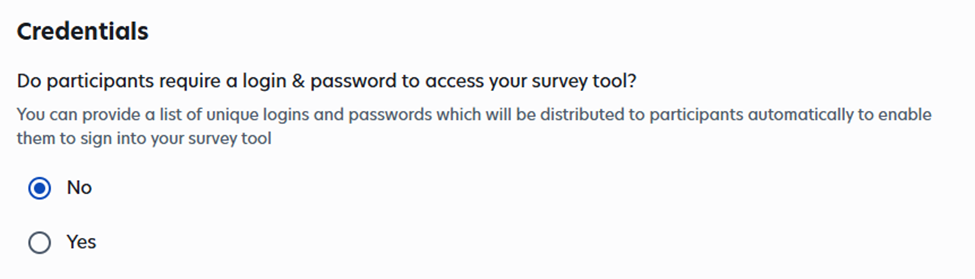
Participants do not need a login or password to join your study, which is one of the advantages of using m-Path. Therefore, when Prolific asks about requiring a login, you can simply select “No.”
Cost
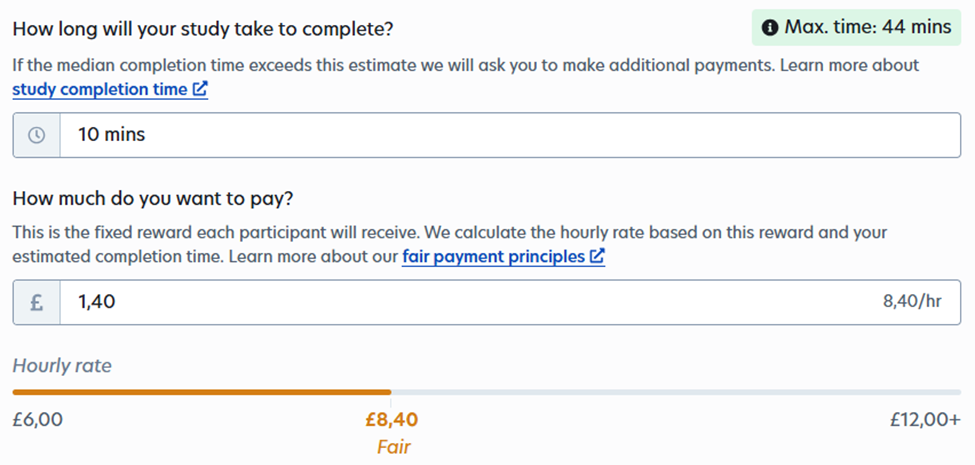
We recommend giving participants enough time to download the m-Path app. On average, 10 minutes is a good estimate: some participants may finish in 2 minutes, while others might take up to 15 minutes. Add the time it takes to complete your intake survey to this estimate, and that will give you the total time to enter in the relevant field on Prolific.
For payment, we suggest a Fair base payment for downloading the app and doing the intake. And using bonus payments to reward participants for responding to the beeps over the following days. Those payments better fall in the category good/great or higher to make the users motivated to actually respond to the beeps. Reward a bonus payment for each beep they react to. So at the end of the study, check for each participant how many questionnaires they filled out and pay them the amount of money you promised for every questionnaire. So we recommend doing it manually, but if you have a lot of participants, you can also do it in bulk, by filtering your data on how many beeps you have per participant and than looking in the manual of prolific on how to do bulk payments. All the information on how to exactly make a bonus payment, you can find on the prolific website: how to make bonus payments.
Although Prolific suggests creating one study per day, we found that having a single study for the entire period is sufficient and less cumbersome for researchers, because you do not need to create multiple studies.
Finally, calculate the maximum total cost of your study in advance to ensure you have enough funds in your Prolific account to pay all participants (since it is not clear from the settings page because you’ll pay a lot on bonus payments). Remember to include VAT and the Prolific platform fee in your calculations.
We also recommend considering a small extra bonus payment for participants who complete all beeps. In our study, there were only nine beeps, and offering this bonus helped motivate participants to answer all of them. However, the decision about whether to include such a bonus, and how much it should be, depends on what fits best for your specific study.
Get started with a pilot study!
Prolific recommends starting with a pilot study, and we strongly advise doing so as well. A pilot study allows you to see how your study works in practice: you can check how your questions perform, how long it takes participants to complete them, and what the response rates are. Everything you need to know about running a pilot study is explained in Prolific’s documentation. Running a pilot first helps you avoid surprises and ensures your full study runs smoothly.
We also have a small example of text to include in your description if you’re going to do a pilot study
This is a pilot study, so it is possible that not everything goes as expected, we still need to learn how to use this platform, so please provide us with feedback if something is unclear or doesn’t work as expected. We thank you in advance for your patience!