You have two options to invite participants to your study
- By researcher’s name or code
- By invitation code
Add a researcher by name/code
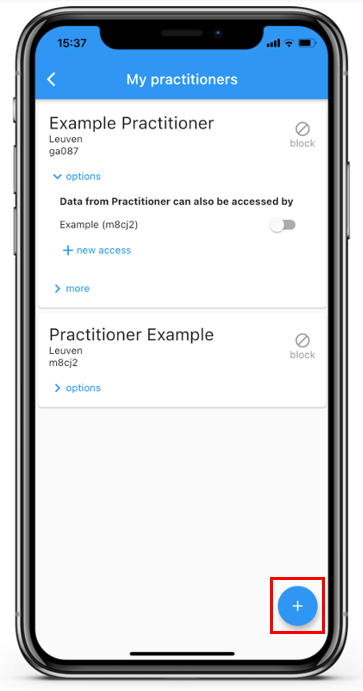
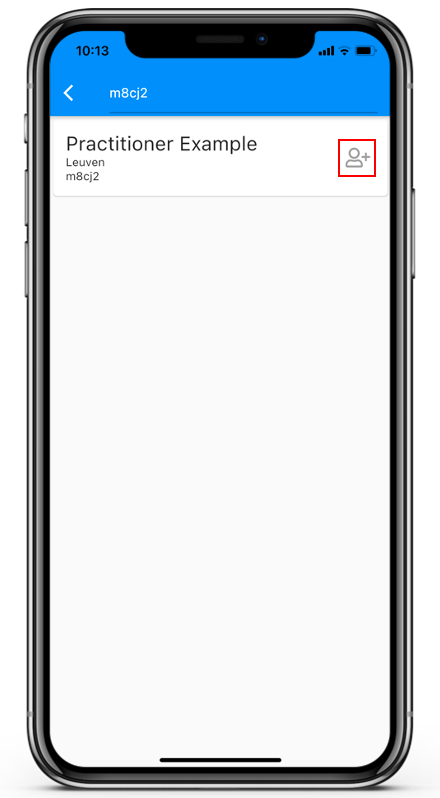
When it’s participants first research with m-Path, go with them through the installing of the app. When participants already downloaded the app, they can add a researcher in the settings of the app (My practitioners). To add a researcher they have to click on the ‘+’ icon.

Add a researcher by invitation code
By using an invitation code, you can create a protected study that is only available for selected participants. Additionally, this invitation code can be used to link study participants with external data. When the data is downloaded, each data line will include the invitation code. This way, m-Path doesn’t need to know the real name or e-mail of the participant, but participants can still be identified by the researcher. To create an invitation code:
- Go to settings in your sidebar and open the “Auto-enroll”-submenu
- Open the “Invitations”-section.
- In the top right corner, click the “+”-icon
- Your browser will prompt you for the amount of codes you want to generate.

Now the section will be populated with the generated codes. In the top-right corner, a download button is visible. This allows you to download the generated codes in a spreadsheet format for easy data processing.
The columns are as follows:
- Legacy code: A remnant of the previous system, you can disregard this column.
- Code: The actual invitation code. Send this to prospective participants to use instead of your practitioner code on sign-up.
- Link: This leads to the page for participants to get onboarded on the app with their code. So it’s very useful to give this link to your participants (every link is unique for every participant).
- Used: This indicator tells you whether the code has been used yet.
- Invitation template: You can assign every code a personalised invitation template, which will be triggered upon sign-up.
If you only want participants with invitation codes to be able to find your study, you can go to Settings, Privacy and check ‘using an invitation code only’. Don’t forget to save!
Link invitation codes with Qualtrics survey data
To match Qualtrics and m-Path survey data, you can generate a list of unique invitation codes trough m-Path and upload these as a contact form in Qualtrics. You can use authentication validation to ensure participants can only start the Qualtrics survey after entering a valid m-Path invitation code.
Generate a list of unique invitation codes for your m-Path study following the procedure outlined above and save it as a .csv file.
To upload the file as a contact form, Qualtrics requires that the invitations codes are stored in the following format:
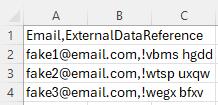
- The Email column is required (If you’re not using emails, you can just provide fake email addresses).
- The ExternalDataReference column contains your valid invitation codes (use the code column from the original extracted m-Path file, not the LegacyCode column).
Upload your file to a contact list in Qualtrics:
- Go to Qualtrics and click the Directory tab.
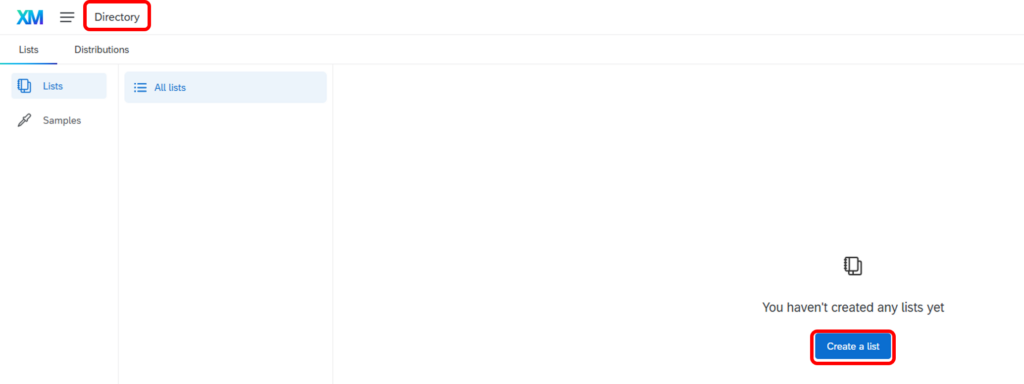
- Select Lists and Click “Create a List”
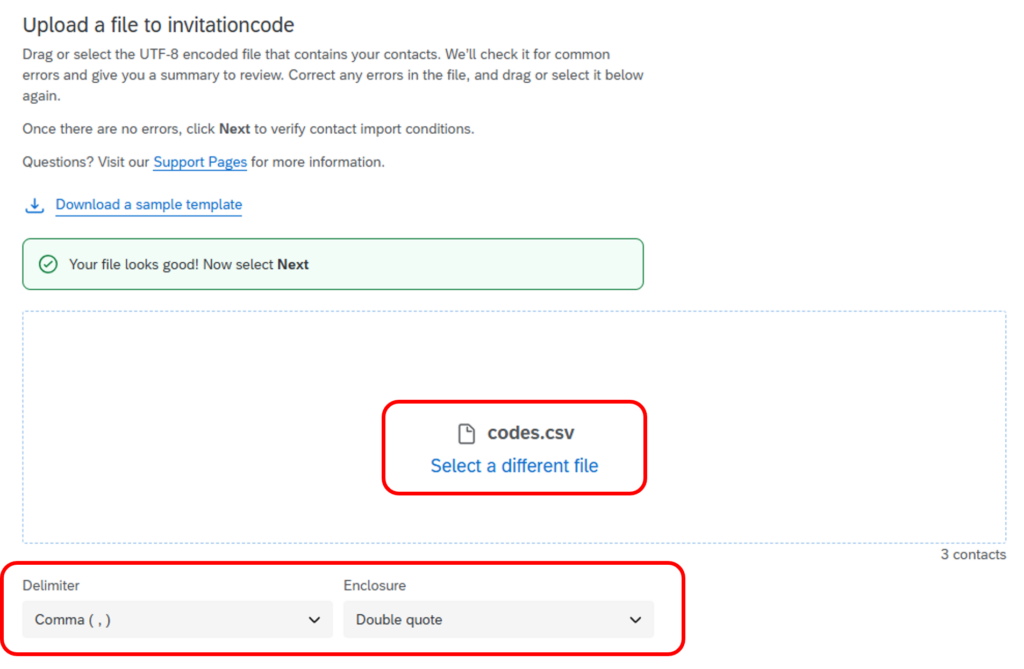
- Give the List an appropriate name (e.g., invitationcode).
- Upload your .csv file and make sure your delimiters and enclosures are appropriately defined.
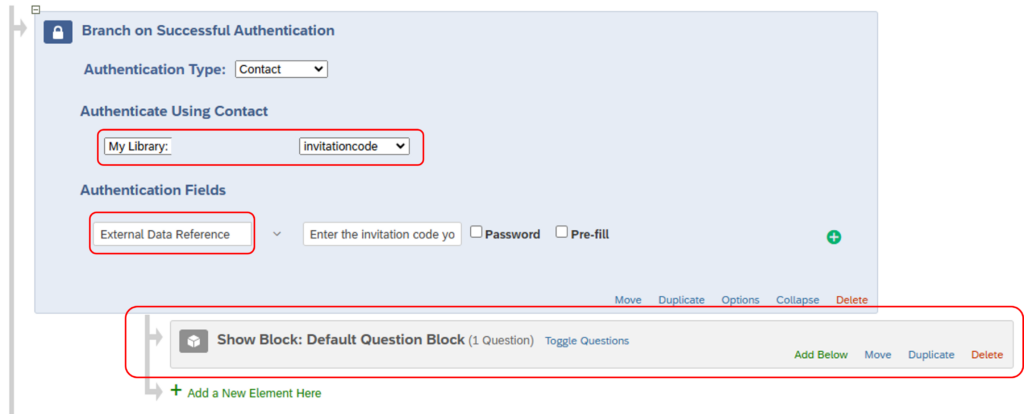
Finally, we need to specify the Authenticator in Qualtrics’ survey flow:
- Open your survey and go to the Survey Flow tab.
- The first block should be an Authenticator.
- Select “Contact” under Authentication Type and select the appropriate field to authenticate “External Data Reference”.
- You can specify the text that is displayed next to the login (e.g., “Enter the invitation code you received.”).
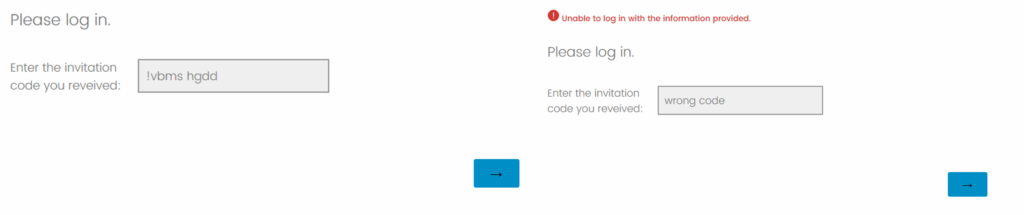
The survey should look like this (in case of correct and incorrect codes entered):